How to choose an antenna for my Helium Miner? Helium Mining, LongFi and IoT in general is a rapidly growing market. In this video we raise and address a number of common antenna questions, making sure you understand the basic fundamentals before spending money on Helium Mining antenna upgrades.
For product specific information please visit https://rfshop.com.au/product-category/antennas/helium-mining/
Typical questions raised in this video are the following:
What is the best Helium Miner Antenna? As mentioned in the video, this is a loaded question, and really depends on your particular situation. The main thing is to avoid bad quality (i.e. too cheap) antennas. Also, be careful that the gain is not advertised as better than expected, since that clearly shows somethings odd or just wrong.
How do you get the best of your Helium Miner? This relates direct to your cable and antenna selection, and where the antenna needs to be placed. This is discussed and explained in the video.
Are higher gain antennas better than low gain? In principle no, as it does vary to application. Generally a higher gain antenna gets you further and that’s important, but if you have obstructions you may want to go for a lower gain antenna so you can have some height coverage as well.
What is the range / reach of my antenna? This actually means you need to check more things about the antenna and miners than just the antenna gain. Are there obstructions in the way (and can you clear those by lifting your antenna higher?). Since Helium works around 900MHz it’s possible to calculate the path losses and RFShop will do this in subsequent videos.
See our range of Helium Miner outdoor antennas at https://rfshop.com.au/product/helium-miner-long-fi-iot-outdoor-omni-antenna-upgrade-kit/
Video transcript:
How to choose a Helium Miner antenna? Over the last couple of months and and really recent weeks it came to light there’s a lot of activity and a lot of interest in lorawan helium mining, longfi, any of those technologies. Specifically with the antennas and antenna upgrades that might be available. There’s a whole new community of people suddenly looking and making inquiries about antennas. I had a look online and there’s also I’d say a bit of questionable information being shared or statements being made online. So I just wanted to take this opportunity to present some of the antenna fundamentals and basics that we apply at RFShop. In our 4G and 5G world, also in the wi-fi world just make sure that that the fundamentals and the basics are well understood for people that want to go for Helium mining.
So the questions that currently seem to be quite prevalent on the internet:
What is the best helium mining antenna ? The short answer to that is: there is no best helium antenna! The thing here is, you need to look at quality so if you look for bad quality antenna then you’re going to have a problem. So if I refer back to my 4G/5G experience and what you see if you go on the typical online stores (Ebay or Amazon – nothing against the platform). It’s just sometimes, the people that sell there really like nonsense statements about the antenna performance/gain. For example 40 or 50 dbi gain is not possible. Then they have those really small antennas – they also will not be suitable, it is a matter of physics. Don’t buy cheap as you can get, that’s the big thing I would say.
The best antenna is that needs to be looked at for your specific application. So the question then becomes how do I choose what antenna is best for my setup? You definitely have to look what your setup is and in this video I really want to go through a few scenarios and just kind of explain the different parameters that an antenna has and how that could apply for you and how you can make the best decisions for your antenna.
Another question we get, not just for helium mining, but a question you can get for any type of application, we hear this a lot is: how far will my antenna go? How far will my helium miner reach with this antenna? That’s a bit of a difficult question and probably a bit easier to answer with helium mining because you know the frequency band is like say 915 or 928 megahertz in Australia. You know at least what frequency is being operated at, so you can do some calculations using a specific type of antenna to see what are the losses over the air from point A to point B. You do need to take into account that what is the actual performance of the receiving end as well. There’s a lot of mastering involved but you can get a better number. But it’s not an easy one and you also need to take into account what obstructions there are between you and the other point. Maybe not in this video but subsequently we can talk about that as we go through different videos as well. Now one important thing it’s not just an antenna but to me it’s just another antenna of the antenna type we’ve already been selling. So now I just realized we need to emphasize the antennas are also applicable for Lorawan, for helium mining and for all sorts of IoT applications. So we have the listings on rfshop.com.au where we now have four different types of antennas, which are all omni antennas. 3,6, 8 and a 9 dbi omni – I have them here on my table as well. So there’s a 3 dbi, there’s the 6 dbi and then behind me that long one let me just show you – is what you would expect from the 9 dbi type of antenna. So you can see that’s humongous, but it it’s available, can be done, so we obviously need to present that as an option.
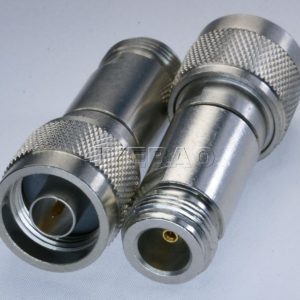
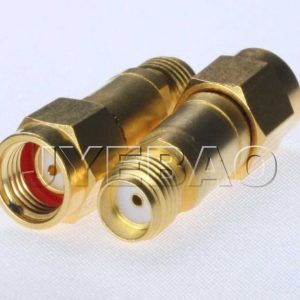
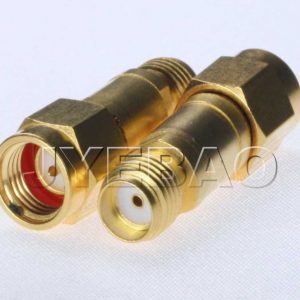
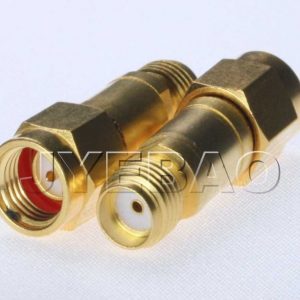
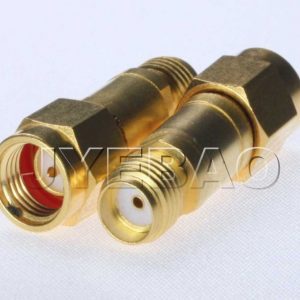
In the kits that we have on our website we combine it with cable. We have five and ten meter cables – what is very important from RFShops perspective, is coaxial cable is a customizable item and we do a lot of custom coaxial cables. So you can go to our custom cable builder or you can reach out to RFShop and you can ask for specific cable length and if you want different connectors than what we have in the kit, always just ask, we definitely have those options. SMA and N-type connectors are quite standard for us to deal with also the cable types.
As far as RFShop is concerned we have this channel, we’re running this channel for all sorts of wireless technologies, so please stay connected. Like what we’re doing if you specifically think the topic of helium mining is of interest and is also important to you and if you think we can talk more about some of the topics we’re going to do to discuss today feel free to subscribe actually no don’t feel free to subscribe please subscribe to our channel and click that bell so you’ll see what updates there are that come your way.
The topic for today is really an overview of all the things I guess that is relevant, that I think is maybe not quite clear. Each of these topics can actually be spent, I can spend much more time on them, than what I’m going to do today, because each of them deserve a whole discussion and I mean I’ve been building this channel for almost two years now trying to address each of these differently, and then with different modems and so forth in the 4G world. I’m going to translate that same conversation to helium mining and the IoT as well.
Gain and variation pattern
So the first one is gain and variation pattern – so that’s a loaded question. Size really matters: the first thing is I have seen some comments online where people say there’s a small antenna that has high values or big antennas that have equal number of gain or performance numbers. Look at the source of where it comes from. An antenna at 900 megahertz needs to be for 2 dbi which is a dipole length so that’s that a dipole length is about 16 and a half centimeters long because that’s a half wave at that frequency. Those antennas will be about 2 dbi gain so if you double that size you can get 3 db more gain – that’s how it works, that’s the physics behind it. So if you say about 33 centimeters or a little bit longer you should get in the order of 5 dbi gain. Then double that which means 4 x 16.5 cm or let’s say 70 cm – 80 cm – that’s when you get to the number that’s about 8 dbi gain. So it’s not an absolute statement that I’m making here, but that’s the order of magnitude and if something is totally out of whack, if somebody says there’s an antenna that’s 8 dbi gain and it works at 900 megahertz, but it’s only 30 cm long – no not going to happen, not going to happen.
So the next thing which is an obvious one is basically a directional versus an omnidirectional antenna. So it seems the most logical application for helium mining is to have an omni antenna, because everybody wants to have a presence in the middle of a specific cell, so everybody around them will know that they are, who they are. But say you live on the coast, you only have people living in that cycle or say you are behind a big hill, so it’s kind of pointless to go for an omni antenna in those cases. Its better to think: I want everything there might as well get all my visibility and all the exposure in that direction.
Now this comes into the real issue that I have seen. Where I just want to start with the radiation pattern of an antenna. Typically you see an omni antenna such as this and people show a donut type shape. So they have this and I have used a balloon as well in the past to illustrate how this works. So there’s a balloon shape around the antenna, that balloon shape shows as I have this picture here in front of you, with the two circles, basically you have to see it as all around. So no matter how you turn this thing, you see the same shape.
The problem with that, and what I have now seen and learned, is there seems to be an assumption that it’s like throwing a ball it goes up and it comes down. So the radio weighs from this thing right as up and it comes down a bit later – that’s not how it works. The reason for that doughnut is, we actually (as an antenna engineering community) we use a polar plot. Polar plot means we look at a point and we just look all the ones that are at that angle – that’s how strong it is, that angle – that’s how much it is. At the end it turns out to look like a doughnut. But the reality of how an antenna works is more like a ray of light and that’s why I have that picture on the right and hat’s what I’m going to use going forward. You have an antenna from me to the point far away – and this is with cell phones the same, it’s with 4G the same, it’s with wi-fi exactly the same – from me to there is a straight line over the distance and the speed of light that we’re talking about here. The speed that the radio waves are moving it’s not going to drop down, it’s not going to go loop over so you can’t go this is a high building there’s a really low gain antenna and it’s going to loop over and come down again. It doesn’t work like that, it goes straight – so that’s so important to realize. If there’s something between you and the object in front of you or repeat if there’s something between you and the object you want to talk about and there’s something in between, it’s not going to happen. You need to do something to get out of that line, so that the tree or the building is no longer in the way. That’s what I want to say about that.
Antenna reach
So now just want to quickly run through different gain values to explain the differences there. So first one as I mentioned this is basically a low gain omni antenna. It goes not too far but it goes quite high, so you you have nice view up and down. (Shows illustration in the video) If you have people around you there’s people you want to cover. So you look at that number of people. Let’s say on one side I have their building so if this is next to a high building or highest tower building, you will get coverage through the whole building for instance (you have to be specific about the setup there) and you can see that you have reached across the whole thing. Then on the other side where it’s just this is now all around on the other side there are people, the recipients you want to see, the guy who’s furthest away, who is totally on the edge of the screen – he’s not going to get anything. The one who’s close to the edge close to the point with actually the transition from, maybe there’s a signal to no this is too far away. “Question mark” maybe he gets it, maybe he doesn’t and then people in the field of view of course they’re happy no challenges there.
The next one is a medium gain, saying 6 db is a medium gain, just to compare to what a low gain would be. Say this is an antenna like this one, this is now the 6 db example or 6 db actually specific for the helium mining antenna. You can see it’s a little bit less, so the elevation exposure is a little bit less, so you don’t see that much anymore – so you can’t see that high and that low, you see a little bit less, but you can see further. So now your visibility is a little bit further. How that translates into actual having people there in the building site: you’re not going to have the coverage to the top and to the bottom, but you have a stronger signal as you can see it actually goes a little bit into the building, there’s a stronger signal, so it may go in a little bit. On the other side whether you have little people and little recipients, the guy that’s midway he gets it, the guy below still gets it because the beam is still broad enough, the guy was a bit on the outskirts so bit on the high end now he’s gone, you can’t see him. It still doesn’t reach the guy that’s furthest away.
The last example which is really if you go for the big one, like that big one that I have here behind me – say a 9 dbi omni antenna. Quite a narrow beam so it’s really focused on the horizon. So you really say that’s it I want to go I skim through the horizon but I want to go as far as possible to the horizon and see everything that’s available over there. That’s a good thing, you get far away so there you could see the guy who was the furthest away on the screen, now he has a tick – he’s happy. The guy who was a little bit closer – he’s in the line, he’s happy. The guy who was on top, so on the top of the screen right – he’s gone he can’t see anything and the guy who is somewhat in the line but he’s a little bit on the edge – I don’t know if he’s going to get it or not, you’ll have to see. On the building site the picture gets quite interesting and this is where it gets important for me to explain how this works. You of course get nice penetration into the building in that line. So you kind of have to you know you cut into it, and those floors probably will get the signal. But the guys at the top of a high rise building and quite at the bottom, if it goes much lower, they won’t see you, because they’re out of that that signal. I added another person on the screen as well – on the left, who’s behind the building – he’s not going to see you. He would not have seen you if any of the antennas were used. So it’s not a case of we could have jumped over and back down again – he would never have seen anything . So I introduced that little guy there.
Fiberglass vs plastic
Now the the other topic is outdoor versus indoors. I have some comments saying fiberglass is better don’t go for the plastic ones – but that’s not what it’s all about. Fiberglass is more robust against the outdoor elements, so if you are in snow country sure that that will help. If you are in a warm country like Australia that will help, if it rains a lot that will help. If it’s plastic, it’s probably also not waterproof, so the sun might chew it up – so it’s not going to last that long. It might get water in there – then the whole thing will deteriorate. But fundamentally what’s in there is what’s important, and it might be the same thing that’s in there for a plastic antenna or a rubber antenna or this fiberglass antenna. It’s just how they protect it so that it can be placed outside or inside. Now nothing stops you from putting an outdoor antenna on the inside it’s going to work exactly the same. Also doesn’t stop you from putting a plastic one on the outside, if it’s maybe protected and then doesn’t get any rain or doesn’t get any direct sunlight or something like that. Again size – I mean it’s impractical to put that type of antenna that’s 1.6 meter long inside. I mean it’s just going to be the whole floor long so it’s just practicalities. It’s not possible. And mechanics, well this one for instance, it’s robust – so this one you’ve seen that earlier, you can mount this properly. For the indoor ones – they’re more delicate and you have a magnetic base so nice you could put it on a table maybe close to a window and then you’ll have something that radiates. So that’s really what it’s about. Outdoors, indoors, more mechanical questions, more environmental issues have nothing to do with electronics. If somebody has a reliable data sheet again I’m going to say reliable and it says this is a 6 dbi omni antenna – if it’s a plastic one or if it’s a fiberglass one it’ll be 6 db. It’s just where do you place this thing.
Antenna placement
Next question is antenna placement. Now this is one that I think deserves more than just one video, but I’m gonna just have a bit of a summary presentation here. So I’m gonna assume somebody lives in the city and lives in a building, in a block of flats or some high-rise building. If you put it on the outside just outside your window, it’s almost like you have a directional antenna because it’s going to be there and you’re going to have a lot of coverage forward and to the back inside at the same floors, you probably will get some coverage there. But don’t expect that the whole building will get a signal and don’t expect the people on the other side of the same building will get much of a signal either. So the building is what we call a massive attenuator – a block. It just stops things from really going through, so it stops penetration. Now 900 megahertz is not too bad actually, so you will get some movement through. So that’s that’s the awesome thing about this frequency, it does give you a lot of well it’s very forgiving, so it does give you a lot of um penetration through, but it’s going to reduce the signal significantly.
Now another example is the same same setup but basically now you put the antenna a little bit higher. So you put it on the roof or above. What I wanted to highlight, if this is the scenario, is you still have a potential problem where it gets shielded. So your signal is still blocked by corner, so that’s why I said forget about this up and over kind of mindset. It’s really it’s a straight line, it needs to cut straight through so that guy, that little gentleman that or lady that I put behind the building, she’s still not going to see that signal, because she’s still shielded by the building itself.
The last one is, if you can go a little bit higher you can really get the antenna to be clear of any obstruction. You could see the object, you have line of sight (we call it line of sight). I should have used that word earlier: line of sight means you can see where you want to go. If you have human line of sight, if the light goes from one point to the other one, the radio wave is also going to travel the same path, and you could see: well this is going to reach that point. If it’s strong enough, that’s not a question, but it’s gonna at least have the um the directionality and reach. There, see now in this this case everybody’s happy everybody has a signal.
Now what I have seen as well people put awesome antennas on the inside and I understand and I have heard that’s sometimes just the limit of what is practically possible. So you may not have the luxury of drilling a hole on the outside or being able to screw an antenna mount onto this side of the building or have something put on the roof. You may only have a rental unit for instance then you put it on the inside. It is what it is in that case but you just need to be mindful that you can’t have a full omni performance. That’s why I said we do need to think maybe directional antennas are an option here. What’s physically going to happen is you get the signal and so through the window or something it will send, will create coverage on one side but to the back, where there’s a lot of walls there’s a lot of obstructions, there might be cabinets, there might be a lot of metal works, it’s just going to cause issues to the back. So that’s a big issue and when you place an antenna somewhere, place it somewhere intelligent, don’t place it behind the fridge, where the fridge is between you and the window. Obviously put it somewhere where it’s close to the window so it actually goes out. I mean it goes without saying, but if there are millions of users out there, you’re going to see some stuff that will surprise you. Let’s just keep it at that.
Cable quality and cable losses
Now cable quality and cable losses – this is really the thing where RFShop is. Where it keeps us so busy, we have so many cables, we do but I just want to talk about this and I’ll just run through 4 popular cables for 50 ohm.
50 ohm is the same for Lorawan as we use for 4G/5G so it’s similar, the application. Very basic summary: low loss good quality will give you the maximum range. You don’t lose any of your signal – not any, you lose very little of your signal in the cable from your modem, or your router, or your miner to your antenna. What happens, if you have bad quality cable. Nothing changes except for have a look at this: the peak point, so the shape change the internal radiation pattern remains the same, everything remains the same, it’s all just weaker. You just don’t get the reach. Which is probably the worst outcome there is because if you had a low gain antenna, at least you had better coverage. Now you have a high gain antenna which is still just this slight elevation, it’s only that but it only reaches up to here doesn’t reach up to there anymore. So it’s kind of the worst of the worst to use bad cables. So I always say antenna is really important but the cable is as important – if not almost more important – because you can mess it all up with a bad cable.
So I want to run through them quickly, there’s a few examples so what I have seen online and the easy ones to use is RG316 or pink colored cable. It’s really thin, it’s very flexible – it’s the most lossy as well: about a db per meter at one gigahertz. Now I just in my quick search this morning when I prepared for the video I didn’t find data sheets for 900 megahertz, I thought it’s close enough. It proves the point that for every meter of that cable, you will lose one db and it will lose 1 db of gain from your antenna basically. That’s really a bad thing. So what we do when when we use this cable for other applications at work GPS or Wi-fi or 4G we say: no longer than one meter, never. So here it’s even more so if you really want your miner to have the maximum coverage, so that you can get the best connectivity to other miners and devices. You definitely don’t want to go for this cable much more than you need.
Then the one that that gets really useful is the LMR195 or equivalent – we have CLF195. You can get LMR195 as well, but CLF is just another brand using exactly the same antenna specification and performance. It’s the size of RG58, so you’re looking about between five and six millimeter total diameter. It’s still very flexible, but the loss is about 0.36 db per meter at 900 megahertz, so basically it’s a third. So it’s really much better than RG316 for cable things.
However if you go to the next one, which is LMR240. Well there’s actually there’s other cables in between as well, but these are just very common ones that you can just get from most places, just straight. CLF240 um it’s more flexible, no not more, it’s a little bit less flexible than LMR195 but it’s still very flexible very easy to handle. The losses are even better, so now you’re at 0.25 db, which is like four times better than the RG316 and typically in the 4G world up to 10 meters we are quite happy to recommend this one. Because it’s practical, it’s very useful, it gets low loss as far as the performance is concerned, but practically it’s still mechanically an awesome cable to use.
Then the last one which seems to be very popular and I do understand why, but it’s not always practical for people, is the LMR400 or CLF400 cable. It’s 10 millimeters, it’s quite hard to work with, so short cable one or two meter cables it actually gets a little bit awkward. I wouldn’t specifically use it for short 1-2m runs, if it was me, but obviously it’s up to customer to decide what they want to use. We definitely recommend this cable starting from about 3m length and over 10 m. The loss there is 0.14 db per meter at 900 megahertz, so it’s definitely way less than the other ones and it’s an awesome cable. That’s all I actually have to say about that.
It’s turning out to be a much longer video than I expected or anticipated, but hey it’s a big topic. It’s an important topic and now we can break it down into these four topics and then spend more on it. Hopefully we will get our own miners soon and then we can play with these antennas see the results in actual life as well, but for now if you buy an antenna think about these things. If you choose a cable choose the right cable don’t just say ah this looks okay, we’ll use this, make sure that you use good quality cable. And if you want any of these antennas from auto shop just visit our website rfshop.com.au and we will help you with the antenna and we will now guide you through the cable selection as well. Thanks for watching and see you in the next video, bye!
keep it simple keep it real